Subscribe to Baking Cakes Galore - don't miss a recipe

Tuesday 15 December 2009

It’s Been A While...........


Hello to our dear readers here at Baking Cakes Galore, its Rosie’s daughter here - Miss R. posting on her behalf. My mum sends you her apologises for her absence and asked if I could update you.

Regrettably since mum’s last post, her ongoing back problems took a turn for the worst, with mum taking bed rest, waiting for the pain to subside and the healing process to take its natural course. She is finding mobility currently difficult, although managing now on her walking sticks around the house. Dad and I are missing her scrumptious homemade cooking and baking, but we are managing to muddle along without our head chef in the kitchen. Dad takes everything in his stride and has told mum not to worry we can get by come what may. This must be the first Christmas mum hasn’t baked her usual Christmas fare goodies. This being her favourite time of the year for cooking and baking, it doesn’t help her frustration of longing to get back to normality, and pottering around the kitchen.

Mum would like me to send you her apologises for her lack of homemade baking, which she would have liked to share with you some new scrumptious bakes! She is missing you all very much and looks forward to the New Year when hopefully she will be back with you and offering up some delectable homemade bakes once again!

There are some gorgeous Christmas bakes etc on mums old Blog, just click this link [HERE] and we hope you will enjoy!

All that is left to do is to wish every one of you a very joyous Christmas and may the New Year bring you much happiness from us all here at Baking Cakes Galore!

Tuesday 1 September 2009

Jammy Doughnut Muffins ~ Sweet & Simple Bakes Monthly Bake!


Last month seems to have flown by and here we are at the beginning of a new month, this means time to present ‘Sweet and Simple Bakes Monthly Baking Event’. For this month’s bake, I presented Jammy Doughnut Muffin’s, which just happens to be one of my favourite recipes. These muffins not only take minutes to make and bake but also they are such a sweet and simple bake! There are variations of fillings that maybe used to fill the muffin centres, please view my notes below. These little beauties are definitely superb to add to your repertoire if family or friends happen to call by unannounced for afternoon tea!


Jammy Doughnut Muffins

Makes 12

Ingredients
275g (10 oz) plain (all-purpose) flour
3 tsp baking powder
Pinch salt
100g (4 oz) caster (superfine) sugar
2 eggs
200ml (7 fl oz) milk
75g (3 oz) unsalted (sweet) butter, melted and cooled
1 tsp vanilla extract
12 tsp strawberry or raspberry jam
For The Toping
100g (4 oz) unsalted (sweet) butter
150g (5 oz) granulated sugar
½ tsp ground cinnamon (optional)

You will need 12 hole muffin tin lined with paper cases.

Method

Preheat the oven to 190°C/375°F/Gas mark 5.

Sift the flour, baking powder and salt into a large mixing bowl, and stir through the sugar. In large jug, lightly beat the eggs then add the milk, cooled butter and vanilla extract and beat together. Pour the wet ingredients into the dry ingredients stir gently until just combined. (Do not over mix, its fine to have a few lumps in the mixture.) Spoon half the muffin mixture into the base of each paper case. Top each muffin with a teaspoon of jam. Now equally between each paper case, top with the remaining muffin mixture. Bake in the preheated oven for 15 – 20 minutes until well risen, golden and firm to the touch.

For The Topping: melt the butter in a saucepan over a low heat. Spread the granulated sugar in a wide, shallow bowl with the cinnamon if using. When the muffins are baked, leave in the tin for 5 minutes. Dip the tops of the muffins in the melted butter and then roll in the sugar. You can serve these muffins warm or cold; however, I do prefer to eat them whilst warm.

Note: Any flavoured jam would be equally as delicious to use in this bake as opposed to strawberry and raspberry. You may have some delectable homemade jam(s) you wish to use or what about the sublime Dulce de Leche, (“toffee sauce”) even a thick vanilla custard or stewed apples. The amount of baking powder is correct in this recipe, I know it seems a vast amount but it does work.

Lastly slip into the sublime world of Jammy Doughnut Muffins and eat your heart out on a muffin or two....mmmmmmm....


The posting date for the round-up of all our S&SB Bakers is 2nd September on Sweet and Simple Bakes Blog, please do call by and view our S&SB bakers


Friday 28 August 2009

The Good, The Bad, The Ugly!


I bet you are wondering if Rosie has lost her marbles. Fear not my friends, my marbles still are chinking around in my brain, well I hope so, *giggle*.

I will first start with the word ugly; this is just how I looked last Saturday. My ongoing back condition had raised its ugly head once again, and here was I walking like the hunchback of Notre Dame. I definitely had that distinctive hunch, lent over walking and it wasn’t a pretty sight, it did verge on the ugly! I am taking things slowly and each day as it comes with my back once again.

Bad, well this word came into play because Mr. R. (hubby) had promised me a treat with his - YES HIS – credit card, to a kitchen and home ware store last weekend! You see, because of the Notre Dame experience above, I did not have the pleasure of hammering his credit card; who me, no, not I, how could do such a thing – my lips are sealed *cough*....... Let’s see what this weekend brings *wink* *wink*.

Now for the GOOD, the lovely Katie over at Katiecakes had her first Blog Giveaway, I am SO thrilled and SO excited to tell you that I won!! I was totally shocked and taken back to learn this news; I had to pinch myself to see if it was true! The Giveaway is a gorgeous baking book from Harry Eastwood, Red Velvet and Chocolate Heartache. I have been yearning to own this book since it first came out! Katie asked which unusual ingredient you have, or would like to bake with and how you would use it. This is my answer; my ingredient would have to be beetroot because I have been pondering on making a red velvet cake without all the red colouring. Hopefully the beetroot would stain the sponge enough and with veggies included it’s got to be healthy don’t you think ???

Thank you Katie SO much, I am extremely honoured and thrilled to be receiving this awesome book! If you have not visited Katie’s Blog yet, I fully recommend a visit as you are definitely missing out on such a treat of fantastic baked goodies.

*Phew*, now let us catch our breaths after all this news!!

I thought I would offer you a simple but delicious little bake today. This cake would be ideal to serve as a pudding with vanilla ice cream or whipped cream or even my favourite, lashings of custard. It has a seam of squidgy cherry conserve running through, (much akin to a jam-filled doughnut), the light fluffy almond sponge, with a little crunch from the flaked almonds scattered over the top. In my opinion, it has much of the distinctive flavours of a Cherry Bakewell cake and just as every bit as scrumptious.


Cherry and Almond Cake

Makes a 900g (2 lb) Loaf cake

Ingredients
175g (3 oz) softened butter
150g (5 oz) caster (superfine) sugar
2 eggs, beaten
1 tsp vanilla extract
4 – 6 tbsp milk
150g (5 oz) self -raising (self- rising) flour
100g (4 oz) ground (almond meal) almonds
6 tbsp cherry conserve
20g (¾ oz) flaked almonds
Icing sugar to dust

You will need a 900g (2lb) loaf tin – greased with a little butter and lined with baking parchment.

Method

Preheat the oven to 160°C/fan oven 140°C/325°F/Gas mark 3. In a large bowl beat the butter and sugar together until light and fluffy. Add a little at a time of the beaten egg to the mixture until fully incorporated. Beat in the vanilla extract and 4 tablespoons of the milk. Fold in the flour and ground almonds with a spatula. If the mixture appears a little too thick, add the remaining 2 tablespoons of milk and incorporate it into the mixture until well combined. Spoon half the mixture into the loaf tin and level off with a spatula. Spoon over the cherry conserve leaving a gap all around the edges. Spoon the remaining mixture of the cherry conserve to cover and level off with a spatula. Scatter the flaked almonds over the top. Place in the preheated oven to bake for 1 hr - 1 hr 15 minutes or until golden and a skewer inserted into the centre comes out clean. Let the cake cool in the tin for 15 minutes before turning out onto a wire rack to cool completely. Remove the baking parchment and dust with icing sugar.

Lastly, cut yourself a slice of this magnificent cake, and then sit back, relax and enjoy.

Tuesday 18 August 2009

Going Bananas with Fruit!


I must apologise to you my dear readers for my lack of blogging this last week or so! As I mentioned we were on holiday and had some lovely days out, we went to the seaside and could not have had better weather. A couple of day trips out to idyllic villages with stone cottages and little streams running through and weeping willow tree branches touching the water and moving gently to the flow.

On the agenda also was strawberry picking, well hubby did the picking due to my back problems. We ended up with a few punnets full of sweet ripe fruit, as a result, I made some wonderful strawberry conserve to savour for when the weather turns cold into autumn and winter. A spoonful of this conserve on homemade bread will remind me of a perfect summer’s day! We also made a visit to a local farm where they sell their own produce, I came away with bunches of beetroot – oh yes with still dirt on them ready to scrub and cook. A huge marrow to peel and stuff with mince beef, just how my mum used to make it when I was a child. Potatoes, again with dirt on them and oh boy did they taste good when washed peeled and cooked, it must be the Lincolnshire soil they are all grown in! I was let loose in a home and wear store, *I’m in heaven, I’m in heaven*, where they had beautiful cake stands, elegant cups and saucers, in fact everything you could imagine for an avid cook/baker. Hmmmm, oh yes I did come away with a few little items to add to my little repertoire of things!


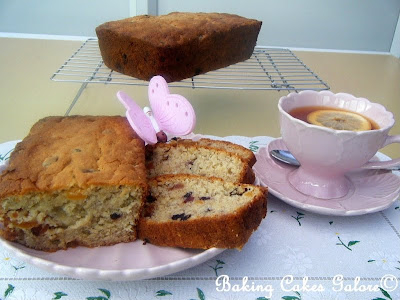
Overall, it was a lovely break, which must have lead to my lack of mojo for baking of late. I hope I have rectified things with you with this gorgeous fruity banana bread. I had six very overripe bananas that need attention in some form or shape, a lovely bag of mixed berries consisting of blueberries, cranberries and golden sultanas and a few glace cherries. Well, the fruit all worked beautifully together and the taste of this banana bread is sublime. I doubled up the quantities of each ingredient and made two fruity banana breads. You could cut one and give one to your friend or even freeze one if it lasts that long! I certainly will be baking this combination of fruits in my banana bread again.


Fruity Banana Bread

Makes one 900g (2lb) loaf

Ingredients
200g (7 oz) self-raising flour
3 large very ripe bananas
Grated zest of 1 lemon
75g (3 oz) dried ready to eat apricots, chopped
50g (2 oz) mixed dried fruit berries (blueberries, cranberries, golden sultanas)
25g (1 oz) glace cherries, chopped
2 large eggs
125g (4½ oz) caster sugar
100g (4 oz) butter, softened

You will need a 900g (2 lb) loaf tin, greased with a little butter and lined with baking parchment.

Method

Preheat the oven to 170°C/fan oven 150°C/325°F/gas mark 3. In a large mixing bowl, cream the butter and sugar together until light and fluffy in appearance. Add one egg at a time and beat into the mixture until fully combined. Add the dried fruit and lemon zest and fold through the mixture. Mash the bananas and fold through the mixture. Sift the flour into the mixture in the bowl and carefully fold in. Place all the mixture into the prepared tin and gently level the top with a spatula. Bake for about 1 hour in the preheated oven, but check after 50 minutes to see if it is ready. The banana bread is ready when a skewer inserted into the centre comes out completely clean. Leave in the banana bread in the tin to cool on a wire rack for 15 minutes before turning out to cool completely. When cold peel away the baking parchment. Keeps well stored in an airtight tin for up to 5 days.

Lastly, pour yourself a lovely hot cup of tea and cut a slice of fruity banana bread. Relax and enjoy the world go by whilst you take pleasure in your little slice of banana nirvana!

Friday 7 August 2009

It’s A Whopper of A Malteser Birthday!


It happens to be Mr R’s (hubby’s) birthday today and I couldn’t let this one pass by without baking his favourite cake of all time to celebrate, which just happens to be Malteser Cake! I have baked this cake numerous times for his birthday and it seems to make its honourable appearance once again this year. You see one of hubby’s treats for Sunday afternoon is a family size bag of Maltesers while watching the T.V. I never witness his hand going to bag then to mouth, feeding in those malty chocolate balls or even the slightest crunch, the only evidence that is left is the empty packet! Who am I to keep a man away from his love of Maltesers? Now you can understand why this cake is always on my baking repertoire come his birthday.

This cake originates from Nigella Lawson, which is published in her book “Feast”. I really like Nigella’s books but for me, “Feast” happens to be my favourite of all time books of hers.


This is one of the easiest cakes to make from scratch. A little melting of a few ingredients and combining wet with dry ingredients together, it really is as simple as that. However, the taste for anyone who adores that malt –choco flavour is utterly divine. The sponge rises in the oven like a billowing fluffy spongy cloud riding on high in the sky waiting when baked too be sandwiched together with a scrumptious malt-choc buttercream. The top adorned with the same malt-choc buttercream and shackles of Maltesers positioned around the top. I was lucky enough to find some white Maltesers too, so I rather went to town on placing lots on the top of the cake.


The recipe for this cake is on my Blog [link] one I made earlier for my son’s birthday! Oh yes he inherited the Malteser bug from his dad *giggle*. The only adaption I made this time was to add two extra spoonfuls of cocoa powder to the buttercream.

I will be back with you all as normal in the blogosphere from next week when our holidays have ended :0)

Lastly, take care now and I hope you will raise a glass to celebrate Mr. R’s birthday with me, cheers.


Saturday 1 August 2009

Carrot Cake with Cream Cheese Frosting ~ Sweet & Simple Bakes Monthly Baking Event.


The first of the month means time to present ‘Sweet and Simple Bakes Monthly Baking Event’. I presented a tried and tested recipe this month of a “Carrot Cake with Cream Cheese Frosting”. Carrot cake has to be one the best classical cakes around, and I have never found anyone yet who refuses a slice. The use of carrots has been included in many sweet recipes in Britain since medieval times. There are many recipes for carrot cake, but for me this has to be one of my family favourites! You could exchange the sultanas for raisins and walnuts for pecan nuts it really is a forgiving cake that does not mind a few little tweaks here and there. The wet ingredients added to the dry ingredients and mixed together in this bake makes for yet another sweet and simple bake. The cream cheese frosting finishes off the cake a treat. However, the frosting maybe omitted if you so wish and served plain. I have seen little fondant carrots adorn tops of cakes and they do look fantastic or for simplicity a few sprinkles of choice or walnut halves, work just as well for me.


Carrot Cake with Cream Cheese Frosting

Serves 12

Ingredients
180g (6½ oz) self-raising (self-rising) flour
½ tsp bicarbonate of soda (baking soda)
Pinch of salt
1 tsp ground cinnamon
½ tsp freshly grated nutmeg
½ tsp mixed spice (Pumpkin pie spice)
2 eggs
150 ml (5 fl oz) vegetable or sunflower oil
200g (7 oz) soft light or dark brown sugar
300g (11 oz) grated carrots
100g (4 oz) sultanas
75g (3 oz) walnuts, chopped (optional)
Cream Cheese Icing
75g (3 oz) cream cheese
75g (3 oz) softened butter
125g (4½ oz) icing sugar
½ tsp vanilla extract
For Decoration
Sprinkles or walnut halves - optional

You will need a 13cm x 23cm (5 in x 9 in) loaf tin, oil and line the loaf tin with greaseproof paper.

Method

Preheat the oven to 150°C/300°F/Gas mark 2. Sift all the dry ingredients into a bowl and leave aside. Beat the eggs in a large bowl, now add the oil, brown sugar, grated carrot, sultanas and chopped walnuts. Stir in all sifted dry ingredients and bring the mixture together with a wooden spoon. Turn into the prepared tin, smooth the top of the mixture and bake in the oven for 1 – 1¼ hours or until a skewer inserted into the centre comes out clean. Allow to cool in the tin for 10 minutes before turning out on a wire rack to cool completely.

To make The Cream Cheese Icing: Beat the cream cheese and butter together in a bowl until combined. Add the vanilla extract, icing sugar and mix to combine. Using a palette knife, spread the icing evenly over the top of the cooled cake. Add the sprinkles or walnut halves if desired. Served cut into slices.

Note: I would advise you to store this cake in a cool place due to the cream cheese icing.

Lastly slip into the sublime world of Carrot Cake and eat your heart out on a slice or two....mmmmmmm....

*I have submitted this post via scheduled posting to ensure the correct posting date due to holidays; we have prearranged plans for a day trip.*


Don’t worry folks; I will be back for posting the round-up tomorrow (2nd August) on Sweet and Simple Bakes Blog, please do call by and view our S&SB bakers creations. If you would like to join in our monthly bake, we would be most delighted to have you join in and bake with us – everyone is welcome!


Tuesday 21 July 2009

We’re Jamming, Jamming, I hope You Like Jamming Too!


A nice cup of tea and a biscuit, now we all like to hear those few words I’m sure. I know I do and I must confess to being a serious dunker of biscuits, do you have a passion for dunking biscuits too? Now come on be truthful here, *giggle*. You just have to get this method right by taking the biscuit between thumb and index finger, and dunking the biscuit in a hot cup of tea just long enough not to break apart and go slosh into the bottom of the cup. However, this activity is supposedly kept to close family members only as it’s rather frowned upon in public – oh well.


These biscuits I have made today are a take on “Jammie Dodgers”, which are a classical biscuit here in the U.K. They are two circles of shortbread sandwiched together by a buttery cream and a good splodge of jam in the centre, the top circle having a small heart shaped cut out in the centre that shows the jam oozing through.


Jammie Bodgers

Makes 12 or more depending on size of cutter used

Ingredients
225g (8 oz) unsalted (sweet) butter, softened
150g (5 oz) caster (superfine) sugar
1 egg yolk, lightly beaten
1 tsp vanilla extract
275g (10 oz) plain (all-purpose) flour, extra for dusting
Pinch of salt
Filling
50g (2 oz) unsalted (sweet) butter, softened
100g (4 oz) icing (confectioners) sugar
5 tbsp strawberry or raspberry jam, warmed

You will require 6cm (2½ in) cookie cutter – fluted or plain, 2cm (¾ in) cookie cutter, heart shaped or shape of choice. *If you haven’t a small 2cm (¾ in) cookie cutter, you could use the end of a piping tip or use a sharp knife to cut out squares or triangles* , 2 baking trays lined with non-stick baking paper.

Method

In a large bowl beat the butter and sugar together until light and fluffy. Beat in the egg yolk and vanilla extract. Sift the flour and salt into the mixture and mix until combined. Wrap the dough in cling film and chill in the fridge for 30 – 60 minutes.

Preheat the oven to 190°C/fan oven 170°C/375°F/Gas mark 5.

Unwrap the dough from the fridge after chilling and sprinkle a work surface lightly with a little flour. Roll out dough thinly and cut out cookies with the 6cm (2½ in) cookie cutter, place half of them on one of the prepared baking trays, spaced well apart. Using 2cm (¾ in) cookie cutter or the end of a piping tip or sharp knife, stamp out the centres of the remaining cookies and remove the centre leaving a ring cookie. Put the ring cookies on the remaining baking tray, spaced well apart. Bake in the oven for 12 - 15 minutes until golden brown. Leave to cool on the baking tray for 5 – 10 minutes before removing onto a wire rack to cool completely.

Make The Filling: in a bowl, beat the butter and icing (confectioners) sugar until smooth and fully combined.

To Assemble: spread the filling over the base of each cookie and top with a little jam. Place the cookie rings on top and press gently together so the jam fills the hole. You can dust the tops with a little icing (confectioners) sugar (optional).

Lastly, sit back with a hot cup of tea and one of these jammie bodgers and start dunking!!!


I also wanted to let you know that we are on holiday for two weeks. We’ve decided to take day trips out due to my back condition and it’s a suck it and see how I go. Unfortunately, I won’t be around the blogosphere as much as normal. However, I am sure I’ll be rustling around in my kitchen baking during these two weeks. I will keep you posted with any new bakes and updates as they arise within these two weeks. Best wishes Rosie xx


Wednesday 15 July 2009

Tang-talising The Senses


After the richness of the little Baileys chocolate muffins below, I thought I would bake a citrus lemon loaf cake this time around to share with you. Adding a streusel topping to this loaf cake would make a change from a normal lemon sponge. It worked out beautifully in taste and texture with the lemon flavour not overtly over powering.


However, if you prefer a sharper zing of lemon, I would then suggest adding a little lemon juice to the sponge or lemon extract to increase the lemon flavour with the lemon zest. This cake is delightful sliced and served with a hot cup of tea mid afternoon when those sugar levels seem to drop a little, and little pangs of hunger set in.

Lemon Streusel Loaf Cake

Ingredients
For The Lemon Sponge
125g (5 oz) softened butter
2 tsp finely grated lemon zest
165g (5½ oz) caster sugar
2 large eggs
110g (4½ oz) plain (all-purpose) flour
75g (3 oz) self-raising flour
60ml (2 fl oz plus 2 tsp) milk
Lemon Streusel Mixture
40g (1½ oz) caster (superfine) sugar
40g (1½ oz) plain (all-purpose) flour
30g (1 ¼ oz) butter, chopped into squares
2 tsp finely grated lemon zest
2 heaped tbsp flaked almonds


You will need 13cm x 23cm (5in x 9in) loaf tin, greased and lined with baking parchment, extending the paper 2cm (¾ in) over the sides.


Method

Preheat the oven to 160°C/fan oven 140°C/325°F/Gas mark 3.

Firstly, make the lemon streusel, place the sugar and flour into a small bowl. Rub the butter in with your fingertips until it resembles breadcrumbs and then stir in the lemon zest and flaked almonds.

For the lemon sponge, in a mixing bowl beat the butter, sugar and lemon zest together until light and fluffy. Add the eggs, one at a time beating in after each addition until fully combined. Sift the two flours together and then fold into the mixture alternately with the milk in two batches. Place the mixture into the loaf tin, smoothing the top with a spatula. Sprinkle the lemon streusel mixture evenly over the top. Bake in the preheated oven for 60 minutes or until a skewer inserted into the centre comes out clean. Leave the loaf to cool in the tin for 10 minutes before turning out onto a wire rack to cool with crumble side upper most. Serve cut into slices.

Lastly relax, serve yourself a slice of this cake with a lovely cup of tea and sit back in admiration of what you have baked.